How to Remove Command Strips Without Peeling the Paint
Adhesive strips tend to come down all at once, usually in the last week of a lease when every frame and hook is being cleared. That’s also when a tab is most likely to snap halfway through a rushed pull, leaving a flat piece of adhesive on the wall with nothing left to grip.
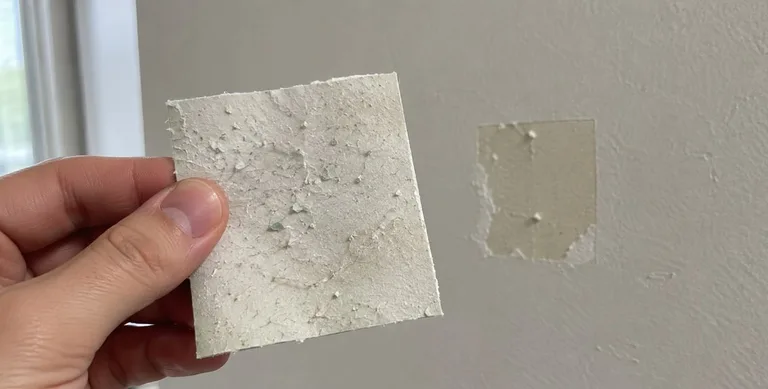
If you need to remove Command strips without taking paint along with them, the method matters more than the brand, and the condition of the paint matters more than either. Stretch-release strips are designed to let go when pulled correctly. Pulled at the wrong angle, or stuck to paint that isn’t well bonded to the wall, they can lift some of the finish with them.
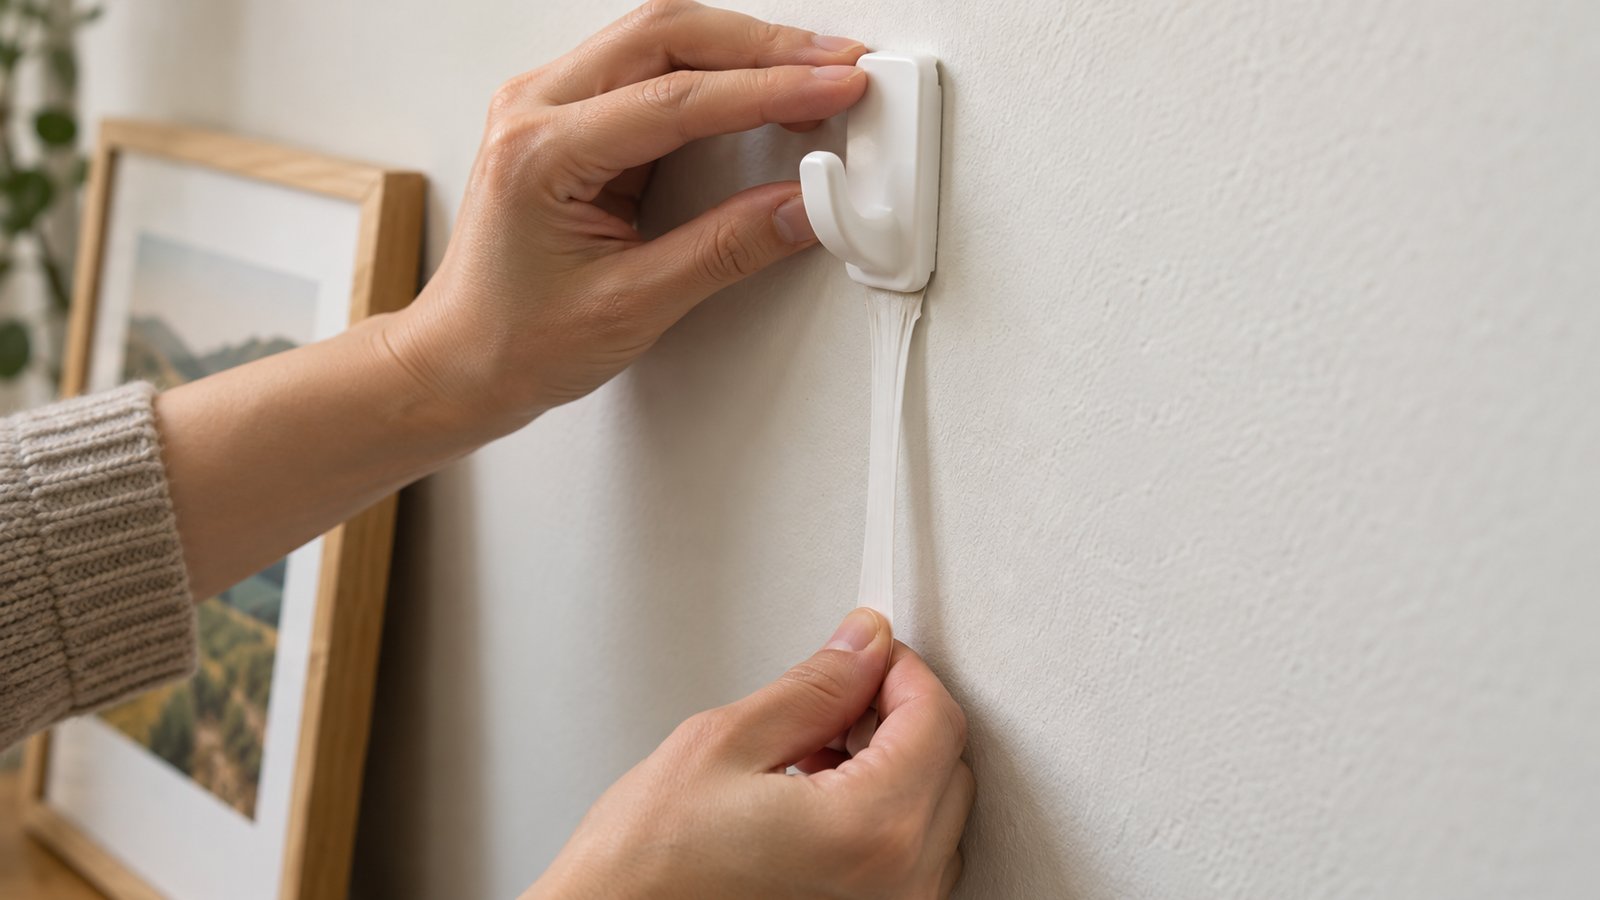
To remove Command strips without damaging paint, take the picture or hook off first, then gently hold the base in place and pull the tab slowly straight down, parallel to the wall, so the strip stretches until it releases. Don’t pull out toward you. If the tab breaks, stretch whatever part of the strip you can still grip; if nothing is reachable, slide dental floss behind it, and use gentle warmth from a hair dryer only if the adhesive still won’t give.
What a Stretch-Release Strip Is
A stretch-release adhesive strip is a foam or film strip coated with pressure-sensitive adhesive that’s engineered to lose its grip when stretched along its own length. Stretching thins the strip, and as it thins, the adhesive pulls away from the surface gradually instead of all at once. Command is the best-known brand, sold by 3M, and several other brands work on the same principle. The release depends on direction: pulling along the wall stretches the strip, while pulling away from the wall puts the force on the paint instead.
Why Paint Comes Off With the Strip
When a strip pulls paint, the adhesive has usually stayed attached as designed. The weak point is often in the paint itself.
Walls are typically finished with a primer and one or more coats of paint. An adhesive strip grips the top coat. If that coat is bonded to the layers beneath it less strongly than the strip is bonded to it, the coat can come away with the strip. A few conditions make that more likely:
- Fresh paint. Paint can feel dry within hours and still be curing for some time afterward, so a strip applied soon after a repaint is bonding to a film that hasn’t reached full strength.
- New paint over old glossy paint without proper prep. A flat coat over unsanded semi-gloss may not grip well, and can lift in larger pieces.
- Dust, grease, or skipped primer. Any of these can leave the finish coat loosely attached before a strip ever touches it.
Renters rarely know which of these applies. A repaint date may appear on a move-in form, but whether the painter primed over old gloss usually isn’t recorded anywhere. Removing one strip slowly in an out-of-the-way spot is the practical way to find out how a particular wall behaves.
How to Remove Command Strips Step by Step
- Remove what’s hanging first. Separate picture-hanging strips at the interlocking fasteners, or slide hooks up off their base. Don’t pull a strip out from under a loaded item.
- Find the tab. It’s the non-sticky end, usually pointing down. If it’s stuck at the edge, work it free with a fingernail rather than a blade.
- Steady the base. Gently hold the hook or mounting base in place with your other hand, without pressing it against the wall.
- Pull straight down, close to the wall. Keep the tab nearly flat against the paint and draw it downward slowly. The strip stretches much farther than you might expect before it lets go.
- Keep going until it’s free. Stopping partway lets the stretched section relax, which makes it more likely to snap when you resume.
- Check the spot under raking light. Hold a phone flashlight flat against the wall. A faint sheen difference where the strip sat may fade with a gentle wipe; lifted edges or a visible step in the paint mean the finish came up.
- Start with the strip in the least visible spot, such as inside a closet or behind a door.
- Remove it using the steps above, more slowly than feels necessary.
- If it releases cleanly, continue with the rest.
- If paint lifts at the edges, stop and photograph it, then use floss for the remaining strips on that wall.
When the Tab Breaks or the Strip Won’t Stretch
A snapped tab is where careful removal most often turns into scraping, and scraping painted drywall is what tends to cause visible damage. Work through these options in order, starting with the gentlest one available.
1. Stretch what’s left
If a piece of the strip is still exposed below the base or beyond its edge, grip it and pull straight down along the wall, the same way as the original tab. A shorter piece won’t stretch as far, but it often still releases.
2. Use floss if nothing is reachable
Unwaxed dental floss or thin fishing line, slid behind the top edge and worked downward in a gentle sawing motion, cuts through the adhesive layer without prying against the paint. It takes a few minutes per strip and usually leaves some residue, but it puts the least strain on a weak finish.
3. Add gentle warmth if the adhesive still won’t give
A hair dryer on its low or warm setting, held several inches away and kept moving, can soften stiff adhesive enough to make floss or a remaining tab work more easily. Keep the heat brief: some paints soften with sustained heat, and a hot strip can pull a softened finish along with it. Stop once the strip feels pliable.
Comparing Removal Methods
The risk column refers to the paint, not the strip.
| Method | Best for | What can go wrong | Deposit Risk |
|---|---|---|---|
| Slow pull straight down | Intact tabs on cured paint | Little, if the angle stays parallel to the wall | Low |
| Dental floss or fishing line | Strips with no reachable tab, fragile paint | Slow, and residue usually remains afterward | Low |
| Brief warming with a hair dryer | Old or stiff adhesive, alongside floss or a remaining tab | Too much heat can soften paint so it lifts with the strip | Moderate |
| Pulling outward, away from the wall | Nothing | Puts the pulling force on the top coat of paint | High |
| Scraping with a putty knife or blade | Nothing on painted drywall | Gouges the finish and can tear drywall paper | High |
Cleaning Up Leftover Adhesive
A small smear of residue is common after a broken strip. The goal is to lift it without changing the surface underneath.
Start with your thumb. Rolling dry residue in small circles often balls it up so it lifts off with no product at all. If that doesn’t work, try a cloth barely dampened with warm water and a drop of dish soap.
Rubbing alcohol dissolves many adhesives and evaporates quickly, so it’s a common next step. On flat or matte paint, though, solvents can lighten the color, and rubbing can polish a flat finish into a shiny patch. Dab a hidden spot first, let it dry, and check it under raking light before working on the visible area.
Oil-based adhesive removers and citrus cleaners
Products made to dissolve sticker residue work well on glass, metal, and sealed plastic. On painted drywall, the oils that make them effective can soak into flat and eggshell finishes and leave a darker, greasy-looking patch larger than the original residue. Washing afterward doesn’t always remove it, and the mark can show through a later touch-up. Keep these for hard, non-porous surfaces.
If Paint Already Came Off
Stop removing strips on that wall and photograph the spot before doing anything else: a wide shot to show where it is, and a close-up with a coin or tape measure for scale. Then check your move-in photos of the same wall.
Avoid patching it right away. Whether a touch-up helps depends on knowing the exact paint, color, and sheen, and an off-sheen patch is often more noticeable than the original chip. Our move-out inspection checklist covers how to decide between repairing, documenting, and leaving a spot alone. If your lease or move-out instructions mention wall repairs, ask the landlord in writing what they’d prefer before trying anything.
Strips on Surfaces Other Than Flat Painted Walls
Tile and glass. Pull straight down as usual. Residue cleans up easily on glazed tile and glass, and hard-surface adhesive removers that are risky on paint are generally fine here.
Wood trim and doors. Painted trim behaves much like a painted wall. Stained or varnished wood can lose its finish under solvents, so start with the dry thumb method.
If strips are already attached to wallpaper or textured walls. Manufacturers don’t recommend adhesive strips on either surface, so if you’ve inherited strips there or put them up before knowing, the job is getting them off with as little disturbance as possible. Wallpaper can tear at the face or lift at the seams, so floss is usually safer than pulling. On textured walls the adhesive grips the raised areas unevenly and residue settles in the low spots; floss followed by the dry thumb method tends to work better than a long pull. For removable wallpaper you installed yourself, see our notes on peel-and-stick wallpaper.
Setting Up the Next Strip for an Easier Removal
Clean removal starts at installation. A few habits make it more predictable:
- Clean the spot with rubbing alcohol before applying, as strip manufacturers recommend, and let it dry. Household cleaners can leave a film that interferes with adhesion.
- Keep the tab pointing down and uncovered by the frame or hook, so it’s easy to reach later.
- Avoid freshly painted walls. Manufacturer instructions advise waiting after painting; check the package for the recommended period.
- Keep track of where strips went, with a quick photo of each one as it goes up, so none get missed behind furniture at move-out.
- Remove strips early, a wall at a time, rather than the night before key handover, so there’s time to slow down or ask questions if paint starts to lift.
For heavier items and the trade-offs between strips, hooks, and other no-drill options, our guide to renter-friendly wall hanging compares methods by what each can leave behind. Shelves and window hardware are covered in the guides to renter-friendly shelves and curtain rods.