Renter Friendly Wallpaper: Why “Removable” Isn’t a Promise About Your Wall
This post contains affiliate links. If you buy through them I may earn a small commission at no cost to you. Full disclosure.
A tenant once handed me her keys and said, almost proudly, “I took the wallpaper down myself, so you don’t have to worry about it.” She’d done a beautiful job on the accent wall — some kind of soft green botanical print, genuinely nice. And she had taken it down. That part was true.
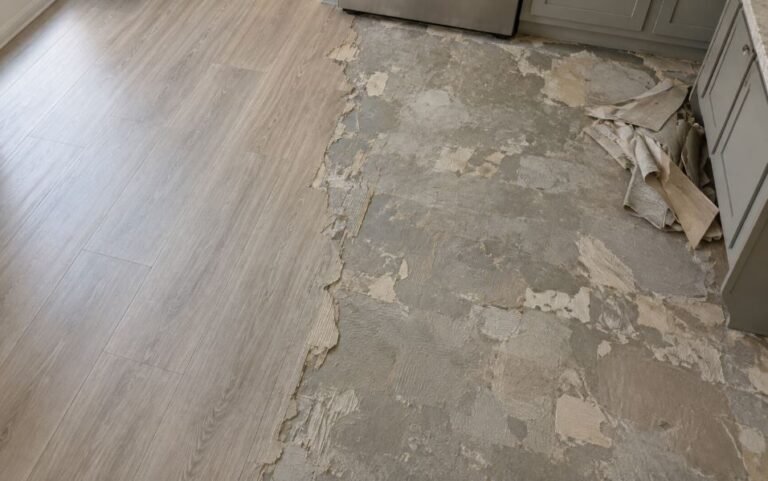
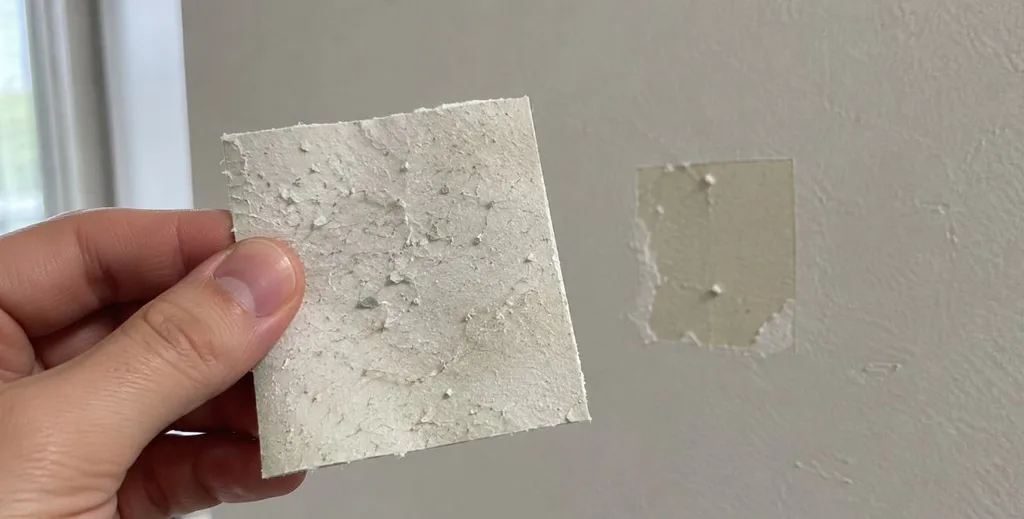
She’d also taken down about forty percent of the paint on that wall, in long strips, exposing the paper facing of the drywall underneath in three or four places. Not scuffs. Not marks. The actual paper skin of the drywall, peeled up and fuzzy. That’s not a repaint. That’s skim coat, sand, prime, then repaint, and it’s the wall you can see from the front door.
She had bought a product that said removable on the box, and she wasn’t wrong to believe it. But renter friendly wallpaper gets sold on a word that describes the adhesive and says nothing whatsoever about your wall.
Removable is a claim about the glue, not the paint
If you’re looking at peel and stick wallpaper for apartments because you want the place to feel like yours without touching anything permanently, you’ve got the right instinct. The product genuinely works. I’ve seen plenty of walls where it came down clean and the wall underneath was untouched.
But think about what’s actually happening when you pull a sheet off. You’ve got a chain of bonds: vinyl to adhesive, adhesive to paint, paint to primer, primer to drywall. When you pull, all of that tension travels down the chain, and it breaks at the weakest link. The manufacturer only controls the first two. They tested their adhesive against a properly cured, sealed surface in a lab, and against that surface it releases cleanly. They have no idea what’s on your wall.
So the question was never “is this wallpaper removable.” It’s “is the adhesive bond weaker than the bond between my paint and my drywall.” And in a lot of rentals, it isn’t — which is a very different question, and one you can actually answer before you commit.
The two things that decide it
First, paint sheen. Flat and matte paint is porous — microscopically it’s full of open texture, and adhesive sinks into that texture and locks in mechanically, not just chemically. Eggshell, satin, and semi-gloss are sealed and slick, and adhesive sits on top where it belongs. Turnover units get flat paint, almost always, because it’s cheap and it hides roller marks. That’s the bad case, and it’s also the common case. Second, cure time. Latex paint is dry to the touch in hours but doesn’t fully cure for around three to four weeks. Apply anything adhesive to paint that’s two weeks old and it will bond into a surface that’s still soft. If you moved into a freshly painted unit and put wallpaper up during your first weekend — which is exactly when everybody does it — that’s the scenario that took my tenant’s wall down to the drywall paper.
Before you buy: the 72-hour corner test
Test the wall, not the wallpaper
- Find a hidden spot. Behind a door, inside a closet on the same wall, low behind where the couch goes. It needs to be the same paint as your target wall.
- Apply a small square of whatever peel and stick you’re considering — a sample, or a corner cut from your first roll. Press it down properly, edges and all. Half-hearted pressure gives you a false pass.
- Wait 72 hours. Not twenty minutes. Adhesives keep building bond strength for days, and a piece that lifts easily after an hour tells you nothing about a piece that’s been up for a year.
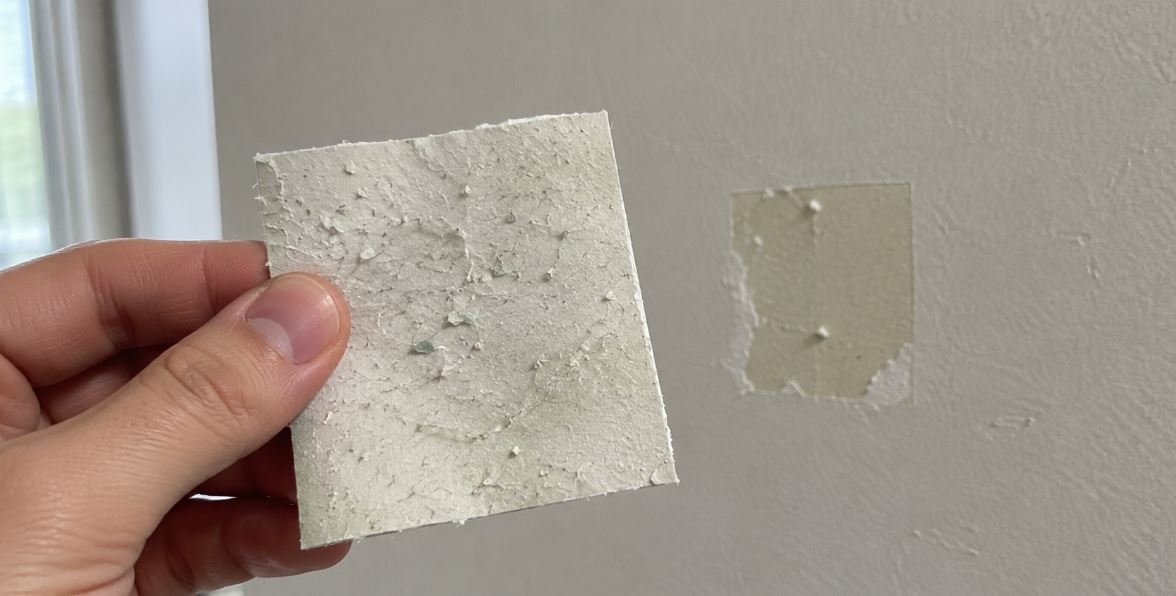
- Pull it off slowly at a sharp angle back against itself, and then look at the back of the square. Any paint flecks, any color transfer, any fuzz? That’s your answer. Your wall is the weak link, and you need a no-adhesive option from the list below.
- Also check the wall itself in raking light. A dulled or slightly rough patch means the adhesive pulled at the surface even if it didn’t fully lift it. Same verdict.
Renter friendly wallpaper options compared by deposit risk
Seven ways to change a wall without drilling or painting, plus the one combination I’d stop you from buying. The risk ratings assume average rental conditions — flat builder paint, applied sometime in the last couple of years.
| Option | Deposit Risk | Needs adhesive on wall? | Best for |
|---|---|---|---|
| 1. Standard peel and stick vinyl | Moderate | Yes | Sealed paint, small areas |
| 2. Fabric-backed peel and stick | Low | Yes, gentler | The default upgrade |
| 3. Prepasted, water-activated | Low | Water-based | Full walls, older paint |
| 4. Liner-first method | Low | Only to the liner | Bad paint you can’t trust |
| 5. Friction-fit wall panels | Low | No | Great idea, hard to source |
| 6. Peel and stick tile | Moderate | Yes | Backsplash, not walls |
| 7. Tension-mounted fabric panel | Low | No | Renters banned from adhesive |
| 8. Peel and stick on fresh flat paint | High | Yes | Nothing. Wait it out. |
Does peel and stick wallpaper damage walls in a rental?
It depends almost entirely on the paint underneath, not the wallpaper. On eggshell or semi-gloss paint that’s been cured for more than a month, peel and stick usually comes off cleanly. On flat or matte builder paint — which is what most rentals have — the adhesive can bond harder to the paint than the paint does to the drywall, and removal takes the paint with it. Test a hidden square for 72 hours before you commit to a wall.
Standard peel and stick vinyl
ModerateThe category everybody means when they say removable wallpaper. Vinyl face, aggressive pressure-sensitive adhesive, repositionable for the first few minutes. The prints have gotten genuinely good and the application is forgiving — you can lift and realign a panel while you work.
My hesitation is that the adhesive is tuned for reliability, which means it’s tuned to hold. It holds through humidity, through a radiator cycling on and off underneath it, through a year of nothing happening. That’s what you want right up until the day you want the opposite. On sealed paint it’s fine. On flat paint I’d want to have run the corner test first, and I’d want to keep the coverage small.
Listings tend to say “removable” without qualifying it. Read it as a description of the adhesive class, not a promise about your specific wall — the manufacturer never saw your wall.
Check price on AmazonFabric-backed peel and stick
LowSame idea, different construction. A woven or non-woven fabric backing instead of pure vinyl, with a lighter-tack adhesive. It’s more expensive per roll and the prints run a little more expensive-looking too, which is either a bonus or an irrelevance depending on your taste.
What matters here is that the whole system is engineered around coming down rather than staying up. Lighter tack means less bond strength transferred to your paint on removal, and the fabric backing keeps its integrity as you pull, so it comes off in full sheets instead of shredding into strips you have to pick at. That second part sounds cosmetic. It isn’t — most paint damage I’ve seen happened during the picking-at stage.
The premium over standard vinyl is real, sometimes double. I’d frame it as buying down the risk on one wall rather than as buying nicer wallpaper.
Check price on AmazonPrepasted, water-activated
LowThe old technology, and renters have largely forgotten it exists. The paste is already on the back, dormant; you wet the sheet, it activates, you hang it. Nobody markets this as renter friendly because “prepasted wallpaper” sounds like something in your grandmother’s dining room.
The removal mechanism is at least a different kind of problem, though. The bond was made with water, so water is what you work against on the way down — you re-wet the sheet, give it time, and it softens rather than fighting you. That’s potentially easier to reverse than a pressure-sensitive adhesive, which has no off switch at all.
I want to be careful about how far I take that, because water-removable isn’t the same thing as paint-safe. Old chalky flat paint is a weak substrate to begin with, and soaking a wall is its own way of loosening things you’d rather leave alone — I’ve seen wet paper lift patches of tired paint on the way off. It’s more work going up than peel and stick, it’s genuinely a bad idea in bathrooms, and it still deserves the same corner test as everything else. What it doesn’t do is bond harder over time, and that’s the specific failure I’m trying to help you avoid.
Worth saying plainly that this one is more work, and that I’m less sure of it than I am of the panels below. It’s where I’d look after failing the corner test, not a guarantee.
Check price on AmazonThe liner-first method
LowNot a product so much as a technique, and it’s the one I’d actually use on a wall I didn’t trust. You hang a smooth wallpaper liner or a lightweight lining paper first, using a low-tack or water-based method, and then apply your peel and stick to the liner instead of to the wall.
Two bonded layers, and the aggressive one never touches your paint. The goal is to bring the liner and the paper down as one system rather than peeling anything off your wall directly. It costs you an extra material, an extra afternoon, and about an eighth of an inch of thickness at the edges. What you get back is that the expensive wallpaper you fell in love with becomes usable on a wall where it otherwise wasn’t — which is the actual problem most people have. They’ve already picked the paper.
Test the liner itself with the same 72-hour square. You’ve moved the risk, not deleted it — the point is that liner adhesive is much gentler than wallpaper adhesive.
Check price on AmazonFriction-fit wall panels
LowRigid or semi-rigid panels held by tension, a rail, or their own weight against the wall rather than by glue. Slat panels, fluted panels, some of the foam brick and shiplap systems. The good ones use a top and bottom rail; the cheap ones just tell you to use adhesive, which defeats the entire point.
You get texture and depth that no printed paper can fake, and there’s no chemistry involved in removal at all. So why is there no link on this one? Because I went looking and couldn’t find a product in this category I was willing to put my name next to. Nearly everything sold as renter friendly wall paneling turns out to want construction adhesive or brad nails once you get past the listing photos and into the actual instructions, and the genuinely rail-mounted systems I did find are sold through trade suppliers rather than anywhere I could reasonably send you.
The approach is still right — it’s the only option here where the wall is simply never part of the equation. If you find a panel system that mounts on a top and bottom rail with no adhesive, buy it. Just read the installation instructions before you order rather than the bullet points. And check the panel depth against your baseboard, because panels that stop short above the trim look unfinished in a way the product photos never show you.
I’d treat the coverage-per-box numbers as optimistic. Cutting around outlets and corners eats more material than the math suggests, so order a spare.
Peel and stick tile
ModerateDifferent animal, same physics, and I’m including it because everyone who wallpapers a rental eventually looks at the kitchen backsplash and thinks about it. Adhesive tile is heavier than paper, and heavier means more shear force pulling on whatever’s underneath it, permanently.
What saves it is location. A backsplash is usually going on a glossy painted surface or the existing tile, both of which are sealed and slick and exactly what these adhesives want. That’s a much better substrate than a bedroom wall. Where I’d say no is applying it to a flat-painted wall for a decorative feature, or anywhere it’ll sit above a stove where heat cycles will slowly cook the adhesive into something that doesn’t release. It’s the same adhesion argument I made about brackets in my guide to renter friendly shelving — the substrate decides, not the product.
Manufacturers give temperature ranges for these. Behind a stove the localized surface temperature can sit well above ambient for hours, and that’s not what the range is describing.
Check price on AmazonTension-mounted fabric panel
LowFabric hung on a tension rod system, floor to ceiling or wall to wall, covering the surface without touching it. It’s the same logic as the freestanding solutions in my post on renter friendly curtain rods, applied to a whole wall instead of a window.
This is the answer when your lease bans adhesives outright, or when you failed the corner test and the liner method still makes you nervous. One thing the listings won’t tell you: you’re buying hardware, not a finished wall. The rod comes on its own and the fabric is your problem — a wide curtain panel, a bedsheet, drop cloth, whatever suits the room. Budget for both.
Fabric also does something nobody expects, which is that it kills echo in an empty-sounding apartment. In a hard-floored unit that’s worth more than the aesthetics. You do lose a couple of inches of room and it reads as fabric, not as a wall. Some people love that. Some find it dorm-adjacent.
The tension hardware ratings here are for the rod, not for wet or heavy fabric. If you’re hanging something substantial, go up a size from whatever the fabric weight suggests.
Check price on AmazonPeel and stick on fresh flat paint — don’t
HighI’m not linking this one, and it’s the only entry here I’d argue with someone about. This is the single most expensive mistake in this whole category and it’s the one people make in their first month, out of enthusiasm, while the apartment still smells like paint.
Flat builder paint that’s under a month old is soft, porous, and only loosely bonded to the drywall beneath it. Pressure-sensitive adhesive on that surface doesn’t sit on the paint — it grips into it. A year later, when you pull, the adhesive wins. You’re not looking at touch-up. You’re looking at drywall paper torn up in strips, which means skim coating and a full-wall repaint, and that whole cost lands on your deposit.
The fix costs nothing except patience, which is what makes it annoying — I write about why I’d rather tell you to wait than sell you something. Wait four weeks for the paint to cure, then run the corner test, then decide. And if the test fails, go to option 3, 4, 5, or 7 — you still get your wall, you just get it a different way.
How to hang it so removal day is boring
- Wipe the wall and let it dry completely. Dust and kitchen film both weaken the bond, and a weak bond fails in patches — which means you’ll press harder, which is how you get the aggressive bond you were trying to avoid.
- Leave a hairline gap at ceilings, corners, and baseboards. A sixteenth of an inch. Paper pressed hard into a corner is paper you’ll have to dig out with a fingernail later, and fingernails are what take paint off.
- Work from the middle outward with a smoother, not a credit card. Hard edges crease the vinyl and crush adhesive into the paint at the crease line. Those lines are the first place damage shows.
- Don’t wallpaper right up to a light switch or outlet plate. Unscrew the plate, run the paper past the opening, cut, and put the plate back over the edge. Cleaner install and no cut edge to pick at later.
- Take photos of the bare wall before anything goes up. Raking light, from an angle. You will want these.
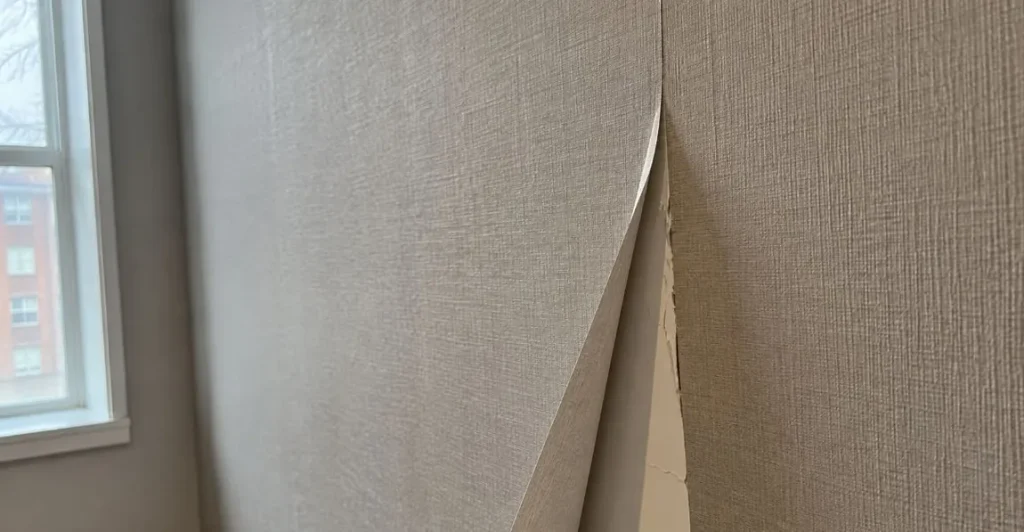
- On removal day, warm each sheet with a hair dryer first. Low heat, moving constantly, a foot or so away. Warm adhesive releases; cold adhesive tears. This one step is the difference between clean sheets and strips.
- Pull slowly at a sharp angle, back against itself. Not straight out from the wall. If you feel resistance, stop pulling and warm it again — pushing through resistance is exactly when the paint lets go.
Where I’d land, wall by wall
Photograph the bare wall before you start
Four or five shots of the whole wall, plus close-ups of anything already wrong — a patched nail hole, a scuff, a seam where the drywall tape shows. Take them at an angle with light raking across the surface, and take them before a single sheet goes up. If there’s a dispute later about whether that damaged patch was yours, a timestamped photo of the wall on day one ends the conversation immediately. And if some of the damage was already there, you’ll be extremely glad you looked.
The tenant with the green botanical print did everything the internet told her to. She bought a product marketed as removable, she installed it carefully, and she took it down herself rather than leaving it for us. Every decision was reasonable.
The one thing nobody told her was to spend three days testing a four-inch square behind her closet door before she committed a whole wall. That’s the entire difference. Test the wall, wait out the cure, keep a hair dryer nearby on the day it comes down — and the accent wall costs you a roll of wallpaper instead of a chunk of your deposit.