Best Renter Friendly Curtain Rods That Won’t Cost You Your Deposit
This post contains affiliate links. If you buy through them I may earn a small commission at no cost to you. Full disclosure.
The apartments I used to manage had a move-out checklist, and one line on it was “window treatments — damage to surrounding wall.” For years I thought that line was mostly decorative. Nobody drills into drywall for curtains in a rental, right? Then I started actually looking at the walls instead of just the windows.
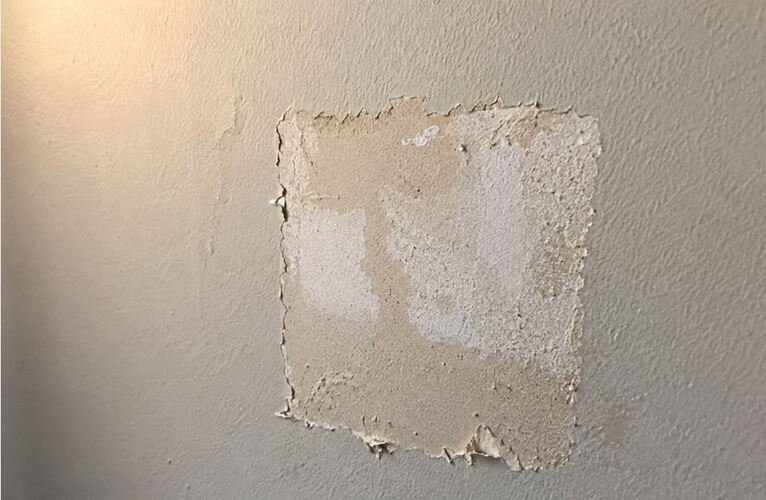
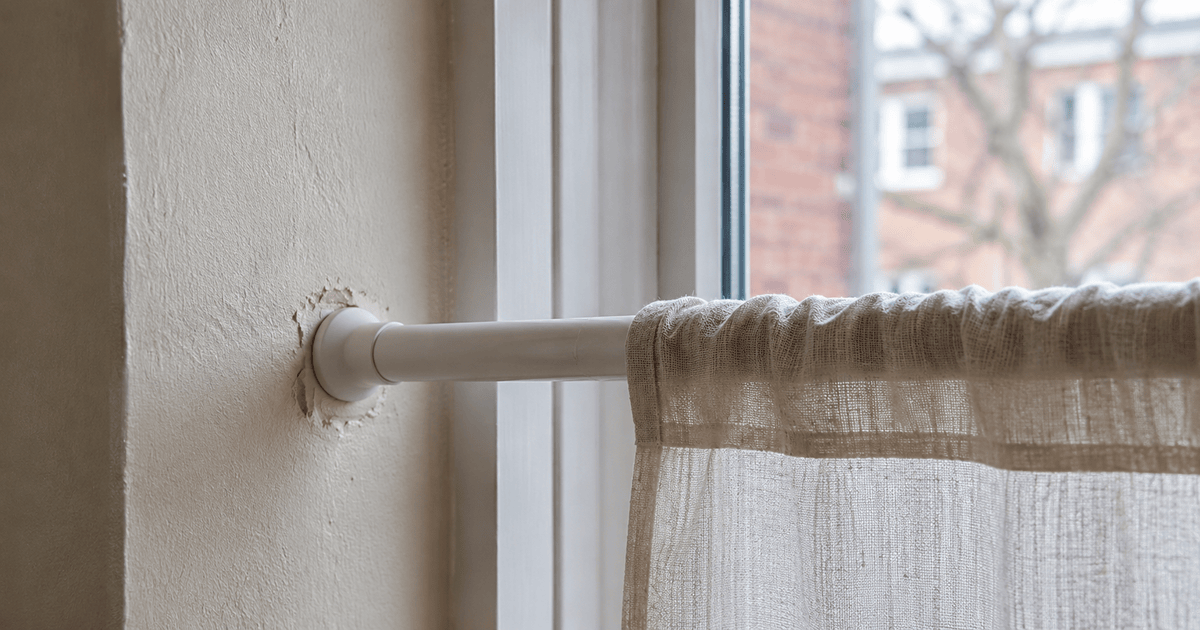
They were everywhere. Two faint circles on either side of the window frame, about the diameter of a quarter, slightly glossier than the paint around them, sometimes with a shallow dish shape you could only see if you stood off to the side and let the light rake across. Every single one came from a tension rod. And I had to write them up, because the paint really was compressed and burnished and no amount of Magic Eraser was bringing it back.
So here’s the thing about renter friendly curtain rods that almost nobody says out loud: the risk isn’t that the rod falls. The risk is that it stays up, quietly, doing damage the whole time.
Everyone’s worried about the wrong failure
If you’re shopping for no drill curtain rods because your lease flatly prohibits wall holes, you’ve already done the hard part — you’re thinking about the walkthrough before you’ve finished unpacking. But search around and you’ll find a hundred articles ranking tension rods by how much weight they hold before they drop. Fair enough. A rod crashing down at 6am is annoying. But a rod that drops is a five-minute problem. A rod that holds is potentially a two-hundred-dollar problem, and you won’t find out until the walkthrough.
The mechanism is simple once you see it. A tension rod works by pushing outward — that’s the whole design. Constant lateral pressure on two small contact points, for months, on latex paint that was probably rolled on the day before you moved in and never fully cured. Paint under sustained pressure does two things: it burnishes (goes shiny) and it compresses (goes slightly concave). Neither is technically a hole. Both read as damage on an inspection sheet — which is the gap between what gets marketed as damage free curtain rods and what my old checklist actually counted as damage.
Then there’s the second failure, which is worse. Hang something heavy — blackout panels, velvet, anything lined — and the rod doesn’t just sit there. It creeps. A millimeter a week, imperceptibly, as the tension slowly loses the argument with gravity. And the whole time it’s creeping, that little rubber end cap is dragging across your paint like a very slow eraser. I’ve seen streaks eight inches long. The tenant had no idea. The rod was still up.
Which brings me to the part nobody mentions.
Span and weight are the actual variables
A tension rod is a compression member, and compression members fail by buckling. Past roughly 48 inches of span, a standard tension rod starts to sag in the middle even with light curtains on it — and the sag reduces the outward force at the ends, which is what was holding the whole thing up in the first place. It’s a feedback loop that ends with the rod on your floor or, more likely, migrating slowly down your wall. Manufacturers list a weight capacity. What they don’t list is that the capacity assumes the shortest setting on the rod. Extend a 36–72 inch rod out to 70 inches and that stated 20-pound rating is fiction. I’d treat it as a third of the number on the box.
Before you buy anything: the two-minute check
Measure the span, then weigh the curtains
- Measure the inside of the window opening (jamb to jamb) if you’re mounting inside, or the outside width plus about 6 inches per side if you’re mounting over the frame. Write the number down.
- Weigh the curtain panels. Bathroom scale, hold them, subtract yourself. Both panels together.
- Now decide. Under 48 inches AND under about 4 pounds total? A tension rod is genuinely fine — pick a padded one and move on. Over 48 inches, OR blackout, OR velvet, OR anything lined? Stop. Tension is not your solution. Go to a clamp-on bracket, a long-span divider system, or freestanding.
Renter friendly curtain rods compared by deposit risk
Seven ways to hang curtains without drilling, plus the one combination I’d talk you out of. The span numbers are where I’d stop trusting each type in a real apartment, not where the box says it fails.
| Type | Deposit Risk | Max span I’d trust | Best for |
|---|---|---|---|
| 1. Standard tension rod | Moderate | 48 in | Light sheers, short windows |
| 2. Wide-pad tension rod | Low | 48 in | The default upgrade |
| 3. Clamp-on bracket | Low | 72 in | Existing blinds or proud trim |
| 4. Adhesive bracket | Moderate | 60 in | Smooth, well-cured paint only |
| 5. Magnetic rod | Low | 40 in | Steel doors, metal frames |
| 6. Freestanding stand | Low | 96 in | Room dividing, odd walls |
| 7. Long-span expandable rod | Low | 120 in | Sliders, alcoves, corners |
| 8. Heavy curtains on a long tension rod | High | — | Nothing. Don’t. |
What’s the safest curtain rod for a rental?
The safest option is a bracket that clamps onto something that’s already there — the headrail of your existing blinds, or the window casing — so there are no screws, no wall contact, and no sustained pressure on paint. Wide-pad tension rods are the next best choice for spans under 48 inches with lightweight curtains. Standard tension rods and adhesive brackets both carry real risk of burnishing or peeling paint, and heavy curtains on a long tension rod are the single most reliable way I know to lose part of a deposit.
Standard tension rod
ModerateThe one everybody already owns. Two telescoping tubes, a spring, two small rubber caps. It costs less than lunch and it will hold a sheer panel for a year without complaint.
My problem isn’t performance, it’s the contact patch. Those caps are usually under an inch across, which concentrates the entire spring force onto two dots of paint. If your unit was repainted recently — and turnover units almost always were — that paint is soft enough to take an impression in a few months. It’s not a dealbreaker, but it’s why I’d spend three more dollars on the next one instead.
Boxes on these usually claim somewhere north of 15 lb. I’d hang sheers and nothing heavier, and that’s a judgment call from looking at walls, not a lab number.
Check price on AmazonWide-pad tension rod
LowSame mechanism, bigger feet. The end caps are broad discs — an inch and a half, two inches — sometimes with a soft foam or silicone face. Spreading the same force over four times the area is the entire difference, and it’s the difference between a mark and no mark.
This is the version I’d hand to a friend who just signed a lease. Same install, same price bracket, same instant removal, meaningfully less risk. The wider pads do look chunkier at the ends, which matters if you’re mounting inside a shallow window and the curtain has to clear them.
One thing to watch: the one I’ve linked extends to 73 inches, and most wide-pad rods advertise a range like that. Buy it for the pads, not the range. I’d still cap it around 48, because a broad end cap doesn’t fix the buckling problem — it just means that when the rod sags, it sags politely. Get the shortest version that covers your span.
Same spring, same rating on the box as the one above. The only thing that actually changed is how the force gets spread out — so treat the weight claim the same way.
Check price on AmazonClamp-on bracket (blind rail or frame)
LowThese grip the outer edge of the window casing or door frame with a tightening screw, and a normal decorative rod drops into them. No wall contact at all. It’s the closest thing to a true no screw curtain rod setup that still takes a real curtain, and that’s a good pitch — the load path goes into trim, which is wood, which doesn’t burnish.
The catch is what they need to grip. Some clamp the window casing, but the ones I’ve linked are made for a different and honestly more common rental situation — they grab the headrail of the vertical blinds your unit already came with. If you’ve got those ugly beige verticals covering a slider, this is the answer nobody tells you about: leave the blinds up, clamp onto the rail, hang curtains in front. Nothing touches the wall and the landlord’s blinds are still there on move-out day.
If your window has no verticals and no proud casing — plenty of newer builds have flush drywall returns — check the product’s clamp style before you order, because these are not interchangeable. And tighten carefully rather than confidently: the jaw can dent a soft headrail or pine trim if you crank it, and that counts as damage too.
This is the one type where the manufacturer’s weight rating is roughly believable, because the load goes into trim rather than paint. Still, the clamp screw is the weak link, not the rod.
Check price on AmazonAdhesive bracket (Command-style)
ModerateStick-on brackets have gotten genuinely good, and on the right surface they’re excellent. On the wrong surface they take a dinner-plate of paint off the wall in one motion. I go into why at length in my guide to renter friendly shelving, because it’s the same physics — but the short version is that adhesive strength isn’t the variable. Paint adhesion is.
Fresh paint that hasn’t cured for a month, cheap flat builder paint, or anything textured, and you’re gambling. Semi-gloss on a wall that’s been painted for a year? Usually fine. The removal technique matters more than the product, and I’ve put it in the steps below.
I’ve left the weight number off deliberately. It depends entirely on the paint underneath, and any figure I gave you would be a guess dressed up as a spec.
Check price on AmazonMagnetic rod
LowNiche, but when it fits it’s the cleanest answer on this list. Magnetic ends clamp to any steel surface — apartment entry doors, a lot of older metal window frames, some basement egress windows. Zero residue, zero pressure, zero anything.
Test with a fridge magnet first. Aluminum and vinyl frames won’t hold, and a surprising number of doors that look like metal are fiberglass. Keep the load light too; magnets shear off sideways more easily than they pull straight off.
Pull ratings on magnets are measured straight-on against bare steel. Painted door, sideways load — assume you’re getting a fraction of the printed number.
Check price on AmazonFreestanding curtain stand
LowTwo upright pipes on flat foot plates, a crossbar between them, standing on your floor and touching nothing else. These are sold as room dividers for studios, which is most of what they do — but they’re also the underrated answer to a window in a wall you genuinely cannot touch. Concrete loft wall. Full wall of glass. A lease that says “no wall attachments of any kind” and means it.
Be honest with yourself about the look. It’s exposed pipe and visible feet, and there’s no version of this that quietly disappears into a room. The feet stick out several inches, so a radiator or baseboard heater under the window kills it outright. What you’re actually buying is certainty — nothing here is safer, and curtain weight stops being a variable. Order carefully, though: these come as sized kits rather than one endlessly adjustable thing, so measure twice before you pick a height and width.
Weight isn’t the constraint here — the base is. Heavier curtains actually make these more stable, which is the opposite of everything else on this page.
Check price on AmazonLong-span expandable rod and divider
LowThis is the category for the window that defeats everything above it — the eight-foot slider, the awkward alcove, the corner that needs curtains on two planes. Expandable systems built for room dividing handle spans that would fold a normal tension rod, because they’re engineered around the length rather than treating it as an afterthought on the packaging.
Read the mounting method carefully before you buy, because this category is not one thing. Some tension between two opposing walls, some use brackets that need a mounting point, some are built to sit in a doorway. That distinction decides whether it’s a no-drill solution for you or not, and the listing photos are frequently less clear about it than they should be. If it needs a bracket and you can’t screw into anything, it belongs to a different reader than you.
The span number is the one spec in this category I’d trust, because it’s the thing these were designed around. Everything else — weight, mounting, finish — varies enough between models that you have to read the specific listing.
Check price on AmazonHeavy curtains on a long tension rod — skip this
HighNo link here, on purpose. This is the combination that shows up on inspection reports more than any other window-related item, and it’s the one I’d actively talk you out of.
Blackout panels on a rod extended past 48 inches will creep. When they creep they scrub paint. And when they finally let go — usually in the middle of the night, usually taking the caps with them — the rod comes down with a strip of paint attached, plus a dent in the sill if you’re unlucky. You’d be paying for the drywall repair and the repaint of that wall, which is never just the damaged square foot. Sometimes the right answer is don’t buy the thing, and this is one of those times. Go to option 3, 6, or 7.
Install it so removal day is boring
- Wipe the contact area first. Dust between a pad and paint acts like sandpaper once the rod starts creeping. Damp cloth, let it dry fully.
- Set the rod about half an inch longer than the span, not two inches. More tension isn’t more safety — past a point it’s just more compression on the paint, and it makes the rod harder to remove without a sudden release that gouges.
- Add a felt pad to each end if the caps are small and hard. Adhesive furniture felt, the cheap kind. This is the single highest-value thirty seconds in the whole project.
- Load the curtains, then leave it a week and look again. Check whether the rod has moved even slightly. If it has, it will keep moving — take it down now rather than in eleven months.
- For adhesive brackets, pull the tab straight down and slow. Not out from the wall. Straight down, parallel to the surface, ten seconds of steady stretch. Pulling outward is what takes the paint with it.
- On removal day, release tension gradually. Twist the rod shorter while supporting both ends. Don’t yank one side free and let the other snap off the wall — that snap is what leaves a scuff after a year of otherwise clean living.
What I’d actually do
Photograph the wall before the rod goes up
Two shots on either side of the window, taken from an angle with light raking across the surface so texture shows. Do the same on the day you take it down. If there’s a dispute about who put the shiny spot on the paint, the timestamped before-photo settles it in about four seconds — and if the mark was already there when you moved in, you’ll be very glad you looked.
That move-out line about window treatments stopped looking decorative to me around year two. By then I could walk into an empty unit and tell you where the previous tenant’s curtains had been without anyone telling me, just from two glossy circles at eye level and a faint vertical smear under one of them.
The tenants weren’t careless. They’d done the responsible thing — they picked the no-drill option specifically so they wouldn’t damage anything. They bought what the listing called renter safe curtain rods and assumed that settled it. They just picked the version that pushes on your walls every day for a year, and nobody told them there was a difference between curtain rods that don’t damage walls and curtain rods that only avoid making holes. Now you know there is. Measure the span, weigh the curtains, and put a felt pad on it.